Summary
A gaming monitor that snaps to black in the middle of a ranked match looks like a hardware funeral, yet the trigger is usually far smaller than a dead panel. A single cable rated for the wrong bandwidth can choke...
Table of contents
- 1 How gaming monitors fail: a quick mental model
- 2 No signal and black screens: start at the connection
- 3 Screen flicker: cables, refresh, and adaptive sync
- 4 Ghosting and smearing: tuning overdrive
- 5 Screen tearing and adaptive sync
- 6 Color, brightness, and HDR that looks wrong
- 7 Dead pixels, backlight bleed, and OLED burn-in
- 8 A repeatable troubleshooting workflow
- 9 Frequently asked questions
- 9.1 Why does my gaming monitor keep going black for a second?
- 9.2 How do I fix flickering on a 144Hz or 240Hz monitor?
- 9.3 Is monitor ghosting permanent or can I fix it?
- 9.4 Why does my monitor say no signal when the PC is on?
- 9.5 Can dead pixels be fixed at home?
- 9.6 Does OLED burn-in affect gaming monitors?
- 9.7 Why does my screen still tear even with a high refresh rate?
- 10 Sources
A gaming monitor that snaps to black in the middle of a ranked match looks like a hardware funeral, yet the trigger is usually far smaller than a dead panel. A single cable rated for the wrong bandwidth can choke a high-refresh 4K signal, because HDMI 2.1 tops out at 48 Gbps while DisplayPort 2.1 in its fastest UHBR20 mode reaches 80 Gbps, according to Wikipedia. Most of the faults that push players toward a replacement, including flicker, ghosting, tearing, and no signal, trace back to settings, cables, or drivers rather than a cracked screen.
This article walks through the symptoms gaming displays produce, why each one happens, and the order to test fixes so you stop losing matches to your own hardware. It pairs with our overview of gaming monitor specs and technologies, which explains the parts these problems sit on top of. Work through the sections in order, or jump straight to the symptom that is ruining your session.
How gaming monitors fail: a quick mental model
Every image on your screen travels a short chain: the GPU renders a frame, pushes it down a cable, a scaler chip inside the monitor interprets the signal, and the panel plus its backlight finally light up the pixels. A fault at any link in that chain produces a recognizable signature. Black screens and no-signal errors point at the cable and source. Flicker and tearing point at timing between the GPU and the panel. Ghosting points at how fast the liquid crystals can change. Color and brightness oddities point at the panel and its firmware settings.
Knowing where in the chain a problem lives saves hours. Instead of swapping the whole monitor, you isolate one link at a time. That logic drives the troubleshooting workflow later in this guide, and it is why the first fix for almost any display fault is the cheapest one: reseat the cable, then check the settings, then update the driver, and only then suspect the panel itself.
No signal and black screens: start at the connection
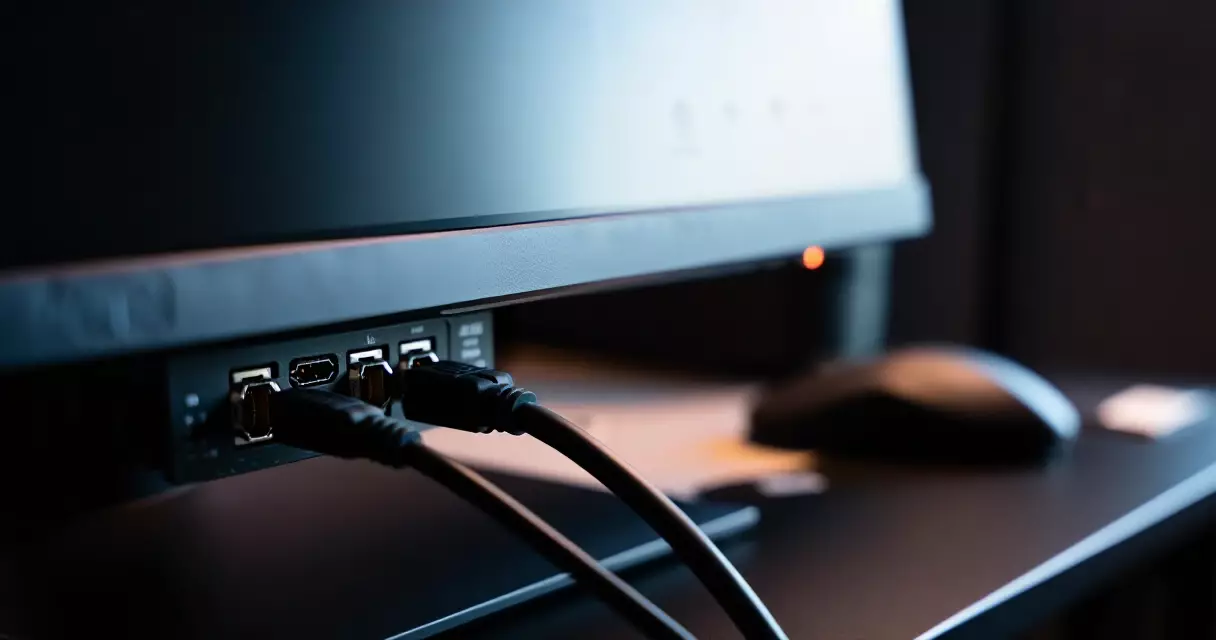
A “no signal” message means the monitor is awake but hears nothing on the input it is watching. The first move costs nothing: press the input button and cycle through HDMI 1, HDMI 2, and DisplayPort until the desktop appears. Many monitors do not auto-detect the active port, so the screen sits dark while the PC runs fine behind it.
If cycling inputs fails, suspect the cable next. Bandwidth matters more than gamers expect, because a cable or port that cannot carry your chosen resolution and refresh rate will either drop to black, fall back to a lower mode, or refuse to sync at all. The table below lists the headline limits for current connectors, drawn from published specifications.
| Connector | Max bandwidth | Typical gaming capability | Source |
|---|---|---|---|
| DisplayPort 2.1 (UHBR20) | 80 Gbps | 4K at very high refresh with headroom | Wikipedia, 2026 |
| DisplayPort 1.4 | 32.4 Gbps | 4K 120 Hz or 1440p 240 Hz with compression | Wikipedia, 2026 |
| HDMI 2.1 | 48 Gbps | 4K 120 Hz, 8K 60 Hz | Wikipedia, 2026 |
| HDMI 2.0 | 18 Gbps | 4K 60 Hz or 1440p 144 Hz | Wikipedia, 2026 |
Swap in a known-good cable rated for your target mode before blaming the monitor. An old HDMI 2.0 cord physically fits an HDMI 2.1 port but cannot pass 4K at 120 Hz, so the picture vanishes the moment you raise the refresh rate. If a fresh cable on a confirmed port still shows nothing, reseat the graphics card and confirm the cable runs from the GPU outputs rather than the motherboard’s video port, which many gaming PCs leave disabled. Choosing the right resolution and refresh combination for your hardware is covered in our piece on refresh rate versus response time.
One more black-screen pattern fools people during boot: the screen stays dark until Windows loads, then springs to life. That points at a refresh rate the panel cannot show during early boot, or a driver that resets the output. Booting into safe mode, lowering the refresh rate, and reinstalling the GPU driver clears most of these cases without any hardware change.
Screen flicker: cables, refresh, and adaptive sync
Flicker has more causes than any other monitor complaint, which is why a single fix rarely works for everyone. Start with the physical layer. A cable that is loose, kinked, or running past its rated length will pass enough signal to show a picture while dropping frames, and the screen blinks as the link drops and recovers. Reseat both ends, route the cable away from power bricks, and test a shorter replacement.
Refresh-rate mismatch is the next suspect. If Windows or your GPU control panel is set to a refresh the monitor only partly supports, the image can strobe. Open display settings, set the refresh rate to a value the panel officially lists, and confirm both the GPU driver and the monitor are reporting the same number. A clean driver reinstall resolves a surprising share of intermittent flicker, since a corrupted timing profile survives normal updates.
Adaptive sync introduces its own flicker on some panels, especially at low frame rates. When G-Sync or FreeSync stretches the refresh window and your frame rate drops into the teens, the backlight brightness can wobble between frames and the screen flickers in loading screens or menus. Capping the frame rate so it stays inside the panel’s variable range, or briefly disabling adaptive sync to confirm the cause, narrows this down quickly.
A steadier, faster flicker can come from the backlight itself. Many displays dim by switching the backlight on and off rapidly, a technique called pulse-width modulation, and sensitive viewers perceive it as flicker or feel eye fatigue at low brightness. The American Academy of Ophthalmology recommends the 20-20-20 habit during long screen sessions: every 20 minutes, look at something about 20 feet away for 20 seconds, per the AAO. Research summarized by Harvard Health also notes that evening screen exposure can disrupt sleep, which is one more reason to manage brightness rather than just crank it. We dig into setup and comfort in our look at whether gaming monitors are bad for your eyes.
- Reseat and replace the video cable, keeping it away from power adapters.
- Set the refresh rate to a value the monitor officially supports.
- Do a clean reinstall of the GPU driver.
- Cap frame rate inside the adaptive-sync range, or toggle sync off to test.
- Raise brightness slightly or enable a flicker-free mode if PWM bothers you.
Ghosting and smearing: tuning overdrive
Ghosting shows up as a faint trail behind moving objects, most visible when a light shape crosses a dark background. The cause is pixel response time, the milliseconds a pixel needs to shift from one color to the next, measured gray-to-gray as described on Wikipedia. When pixels cannot keep pace with the frame rate, the previous image lingers and smears.
Most monitors include an overdrive setting, sometimes labeled response time, OD, or trace-free, that pushes pixels to switch faster. Set it too low and you get ghosting; set it too high and you get the opposite artifact, called overshoot or inverse ghosting, a bright halo trailing the object. The fix is to nudge overdrive one notch at a time while watching fast motion, stopping at the level that minimizes both trailing and haloing. The sweet spot often sits at the middle or one step above.
Panel technology sets a ceiling here. VA panels tend to smear in dark scenes because their slowest transitions involve deep blacks, while TN and modern IPS panels generally respond faster. If your panel is genuinely slow, no overdrive value fully removes the trail, and the realistic goal becomes minimizing it. Understanding why response time and refresh rate work together is worth a few minutes in our explainer on refresh rate versus response time, since a high refresh rate cannot hide a sluggish panel.
Screen tearing and adaptive sync
Tearing is the horizontal split that appears when the top and bottom of the screen show two different frames at once. It happens because the GPU finishes a new frame while the monitor is still drawing the old one, so the refresh and the render fall out of step. The industry answer is variable refresh rate, where the monitor adjusts its refresh on the fly to match the GPU. VESA standardized this as Adaptive-Sync, and the broader concept is documented on Wikipedia.
If you see tearing, confirm that G-Sync or FreeSync is actually enabled in both the monitor’s on-screen menu and the GPU control panel. Many displays ship with adaptive sync off, and turning it on at only one end does nothing. Our comparison of G-Sync versus FreeSync explains which standard your hardware supports and how to switch it on correctly.
Adaptive sync only works inside the panel’s supported range, often something like 48 Hz to the maximum refresh. Push your frame rate above the ceiling and tearing returns, because the monitor cannot refresh any faster. The reliable cure is to cap your in-game frame rate two or three frames below the panel’s maximum so the GPU stays inside the sync window. That cap also keeps latency low, which matters more for competitive play than chasing the highest possible number.
Color, brightness, and HDR that looks wrong
Washed-out or crushed color usually comes from a signal mismatch rather than a bad panel. When the GPU sends a limited RGB range to a monitor expecting full range, blacks turn gray and highlights clip. Open the GPU control panel, set the output color range to full RGB, and confirm the bit depth matches what the panel accepts. That one change rescues many displays that owners assumed were defective.
HDR is the other frequent offender. Enabling HDR in Windows on a monitor with weak peak brightness or no real local dimming often makes the desktop look dull and faded, because the system maps content for a display that cannot deliver the brightness. If HDR looks worse than standard mode, turn it off for desktop work and enable it per game only when the panel genuinely supports it. For motion clarity claims, VESA’s ClearMR program rates how much blur a display produces, described on VESA.
Beyond signal settings, factory color is rarely accurate out of the box. Dialing in gamma, white point, and brightness takes a short calibration pass, and the payoff is a picture that matches what developers intended while keeping input lag low. Our step-by-step on how to calibrate a gaming monitor covers the settings that matter and the ones to leave alone. Color behavior also depends heavily on the panel itself, which is why our breakdown of IPS, VA, TN, and OLED panels is worth a read before you blame your settings.
Dead pixels, backlight bleed, and OLED burn-in
A single bright or dark dot that never changes is a pixel fault. A dead pixel stays black because it receives no power, while a stuck pixel is frozen on one color. Stuck pixels sometimes recover when you run a pixel-exerciser tool that rapidly cycles colors across the screen, gently coaxing the sub-pixel back into motion. Genuinely dead pixels do not recover, and whether one qualifies for a warranty replacement depends on the maker’s pixel policy.
Backlight bleed and IPS glow are different beasts. Bleed is uneven light leaking around the edges of an LCD, most visible on a dark screen, and mild bleed is normal rather than defective. IPS glow is a viewing-angle effect that shifts as you move your head. Neither is fixable through software, though reducing brightness and avoiding pitch-black rooms makes both far less noticeable.
OLED gaming monitors trade those issues for a different risk: image retention and burn-in, where static elements like HUDs or taskbars leave a ghost over time, as documented on Wikipedia. Modern OLED panels fight this with pixel-shift, logo dimming, and automatic compensation cycles that run when the screen is idle. Hiding the taskbar, varying content, and letting the panel finish its maintenance routines keeps retention at bay for most gaming use.
A repeatable troubleshooting workflow
When something breaks mid-session, a fixed order beats random guessing. The table below maps the common symptoms to their most likely cause and the first fix to try, so you can act in under a minute before reaching for deeper steps.
| Symptom | Most likely cause | First fix to try |
|---|---|---|
| No signal / black screen | Wrong input, dead cable, GPU output | Cycle inputs, then reseat or swap the cable |
| Flicker | Loose cable, refresh mismatch, VRR at low FPS | Update driver, lock refresh, test cable |
| Ghosting / smearing | Overdrive too low or too high | Adjust overdrive one notch and recheck |
| Screen tearing | Adaptive sync off or FPS above range | Enable G-Sync/FreeSync, cap frame rate |
| Washed-out color | Limited RGB range or wrong HDR mode | Set full RGB, turn off desktop HDR |
| Stuck or dead pixel | Frozen versus unpowered sub-pixel | Run a pixel exerciser, then check warranty |
For stubborn problems, escalate in this sequence so you only change one variable at a time:
- Power-cycle the monitor and try a second device on the same input.
- Swap the cable for a known-good one rated for your resolution and refresh.
- Test a different port on both the monitor and the GPU.
- Set the refresh rate to a supported value and reinstall the GPU driver cleanly.
- Reset the monitor to factory defaults from its on-screen menu.
- Test the monitor on another computer to confirm whether the panel or the PC is at fault.
Once the display behaves, lock in the settings that keep it that way. Competitive players in particular benefit from a tuned profile that balances clarity, latency, and visibility, which we lay out in our guide to the best gaming monitor settings for competitive FPS play. If a fault survives every step above and reappears on a second PC, the panel or its internal board is the likely failure, and warranty service becomes the sensible next call.
Frequently asked questions
Why does my gaming monitor keep going black for a second?
Brief black-outs that last about a second almost always come from the video link dropping and re-establishing. The usual triggers are a loose or failing cable, a refresh rate set slightly beyond what the panel reliably supports, or adaptive sync renegotiating the connection. Start by reseating both ends of the cable and swapping in a known-good one rated for your resolution and refresh. Next, set the refresh rate to an officially listed value and do a clean GPU driver reinstall. If the blink only happens with G-Sync or FreeSync on, cap your frame rate inside the supported range to stop the constant renegotiation.
How do I fix flickering on a 144Hz or 240Hz monitor?
High-refresh flicker usually comes down to bandwidth, drivers, or adaptive sync. First confirm your cable and port can carry the resolution at the full refresh rate, since an underspecified cable causes intermittent blinking at 144 Hz or 240 Hz. Then set the refresh rate explicitly in display settings and reinstall the graphics driver from a clean state to clear any corrupted timing profile. If flicker appears mainly in menus or loading screens, that points to adaptive sync at low frame rates, so cap the frame rate to keep it inside the panel’s variable window. Raising brightness slightly can also reduce backlight-related flicker on sensitive panels.
Is monitor ghosting permanent or can I fix it?
Ghosting is not permanent damage, because it reflects how fast the pixels respond rather than a broken panel. The main control is the overdrive setting, sometimes labeled response time or trace-free. Increase it one step at a time while watching fast on-screen motion, stopping before you introduce bright halos known as overshoot. Slower panel types, especially VA in dark scenes, have a hard limit on how much you can remove, so the realistic goal is to minimize the trail rather than erase it. A higher refresh rate helps only when the pixels can keep up, which is why response time and refresh rate need to be considered together.
Why does my monitor say no signal when the PC is on?
A no-signal message means the monitor is powered but detects nothing on the input it is watching. Press the input button and cycle through every HDMI and DisplayPort option, since many monitors do not switch automatically. If that fails, confirm the cable runs from the graphics card outputs rather than the motherboard’s video port, which gaming builds often disable. Swap to a known-good cable, test a different port, and reseat the graphics card. Should the screen stay dark only during boot and then work in Windows, lower the refresh rate and reinstall the GPU driver, as an unsupported boot-time mode is a common cause.
Can dead pixels be fixed at home?
It depends on whether the pixel is stuck or truly dead. A stuck pixel is frozen on one color and still receives power, so a pixel-exerciser tool that rapidly cycles colors across the screen can sometimes restore it over several minutes. A dead pixel receives no power, stays black, and does not recover through software. Gentle, careful pressure methods exist but carry a risk of damaging neighboring pixels, so most people avoid them. If a faulty pixel persists, check the manufacturer’s pixel policy, since many honor a warranty replacement once the number or position of defects crosses their stated threshold.
Does OLED burn-in affect gaming monitors?
OLED panels can develop image retention or burn-in when static elements stay on screen for long periods, such as health bars, scoreboards, or the Windows taskbar. Current OLED gaming monitors counter this with pixel-shift, logo and taskbar dimming, and automatic compensation cycles that run when the display is idle, as covered in general references on screen burn-in. For mixed gaming and desktop use, hide the taskbar, vary your content, lower brightness on static interfaces, and let the panel complete its maintenance routines rather than yanking power immediately. With those habits, retention stays minimal for typical gaming, though heavy static use raises the long-term risk.
Why does my screen still tear even with a high refresh rate?
A high refresh rate alone does not prevent tearing, because tearing comes from the GPU and monitor falling out of step rather than from a low refresh number. Confirm that G-Sync or FreeSync is enabled in both the monitor’s menu and the GPU control panel, as turning it on at only one end does nothing. Adaptive sync also works only inside a set range, so frame rates above the panel’s maximum will tear again. Cap your in-game frame rate two or three frames below the panel’s ceiling to keep the GPU inside the sync window, which also helps hold input latency low.
Sources
- DisplayPort specification overview – https://en.wikipedia.org/wiki/DisplayPort
- HDMI specification overview – https://en.wikipedia.org/wiki/HDMI
- Variable refresh rate and Adaptive-Sync – https://en.wikipedia.org/wiki/Variable_refresh_rate
- Response time (technology) – https://en.wikipedia.org/wiki/Response_time_(technology)
- Screen burn-in – https://en.wikipedia.org/wiki/Screen_burn-in
- VESA display standards and ClearMR – https://www.vesa.org/
- American Academy of Ophthalmology, computer use and the 20-20-20 rule – https://www.aao.org/eye-health/tips-prevention/computer-usage
- Harvard Health, blue light and sleep – https://www.health.harvard.edu/staying-healthy/blue-light-has-a-dark-side
Gaming Laptop Buyer’s Guide: Performance, Portability & Best Models